Tag: test-automation

  • Key Aspects I Consider in Automation Project Code Reviews.

    Key Aspects I Consider in Automation Project Code Reviews.

    Recently, I’ve been involved in conducting code reviews for my team’s end-to-end test automation project, which utilizes Playwright technology. I dedicate about a couple of hours each day to this task, either by reviewing others’ code or by responding to feedback on my own pull requests. 

    I firmly believe that we as test automation engineers should approach test automation as any kind of software because test automation is software development. Software developers should have solid knowledge on tools and best practices like: coding and naming standards, configuration management, code review practices, modularization, abstraction, static analysis tools, SOLID and DRY principles, etc. A well-established code review process is one of the success points while working on the test automation projects. You might find a lot of best resources on how to conduct code review: code reviews best practices by Google, by GitLab and others. In this article, I would like to point out several aspects I pay attention to while reviewing test automation code in addition to standard guidelines. 

    Automate what can be automated!

    Make your life easier 🙂 Automation can significantly simplify managing run-time errors, stylistic issues, formatting challenges, and more. Numerous tools are available to assist with this. For a Playwright project using TypeScript, I recommend installing and configure the following:

    • ESLint: This tool performs static analysis of your code to identify problems. ESLint integrates with most IDEs and can be implemented as part of your CI/CD pipeline.
    • Prettier: A code formatter that is helpful in enforcing a consistent format across your codebase.
    • Husky: Facilitates the easy implementation of Git hooks.

    In this detailed guide by Butch Mayhew you can find all the information you need to install and configure these tools in your project.

    Identify easy to spot issues first

    First thing you have to look for is any preliminary checks required for the PR to be merged, like: merge conflicts, outdated branches, failed static analysis tools or formatter checks. Then you might briefly look for easy to spot poor coding practices and errors: naming convention, redundant debug lines (for example, console.log()), formatting, long or complex functions, unnecessary comments, typos and so on. Moreover, you might spot violation of agreed rules within the team, like test case id or description, etc. 

    Verify that each test should focus on a single aspect. 

    The general guideline is that tests should contain only one assertion, reflecting the primary objective of the test. For example, if you’re verifying that a button is correctly displayed and functional on the UI, the test should be limited to that specific check.

    Here’s an example using Playwright for a TypeScript project:

    import { test, expect } from '@playwright/test'; 
    
    test('should display and enable the submit button', async ({ page }) => {        
     await page.goto('https://example.com'); 
     const submitButton = page.locator('#submit-button'); 
     await expect(submitButton).toBeVisible(); 
     await expect(submitButton).toBeEnabled(); 
    });


    Additionally, name the test to reflect its purpose, capturing the intent rather than the implementation details.

    Separation of concerns

    Separation of concerns is a fundamental design principle that we might need to stick to. When structuring code with functions and methods, it’s crucial to determine the appropriate scope for each. Ideally, a function should do one thing and one thing only. Following this approach, you will achieve a distinct and manageable codebase.

    In UI testing, the most popular approach for maintaining separation of concerns is the Page Object Pattern. This pattern separates the code that interacts with the DOM from the code that contains the test steps and assertions.

    Proper separation of concerns within tests also means placing setup and teardown steps in separate functions or methods or beforeEach or afterEach steps. This practice makes it easier to understand the core validation of the test without being distracted by the preparatory steps. Importantly, setup and teardown functions should avoid assertions; instead, they should throw exceptions if errors occur. This approach ensures that the primary focus of the test remains on its intended verification.

    Is the locator / selector strategy solid?

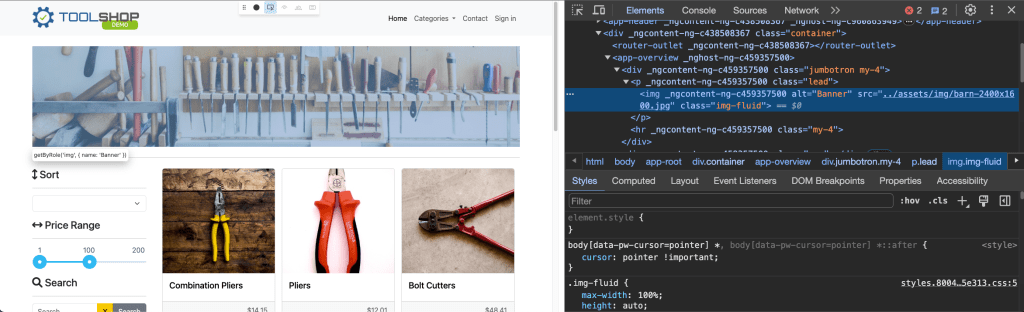
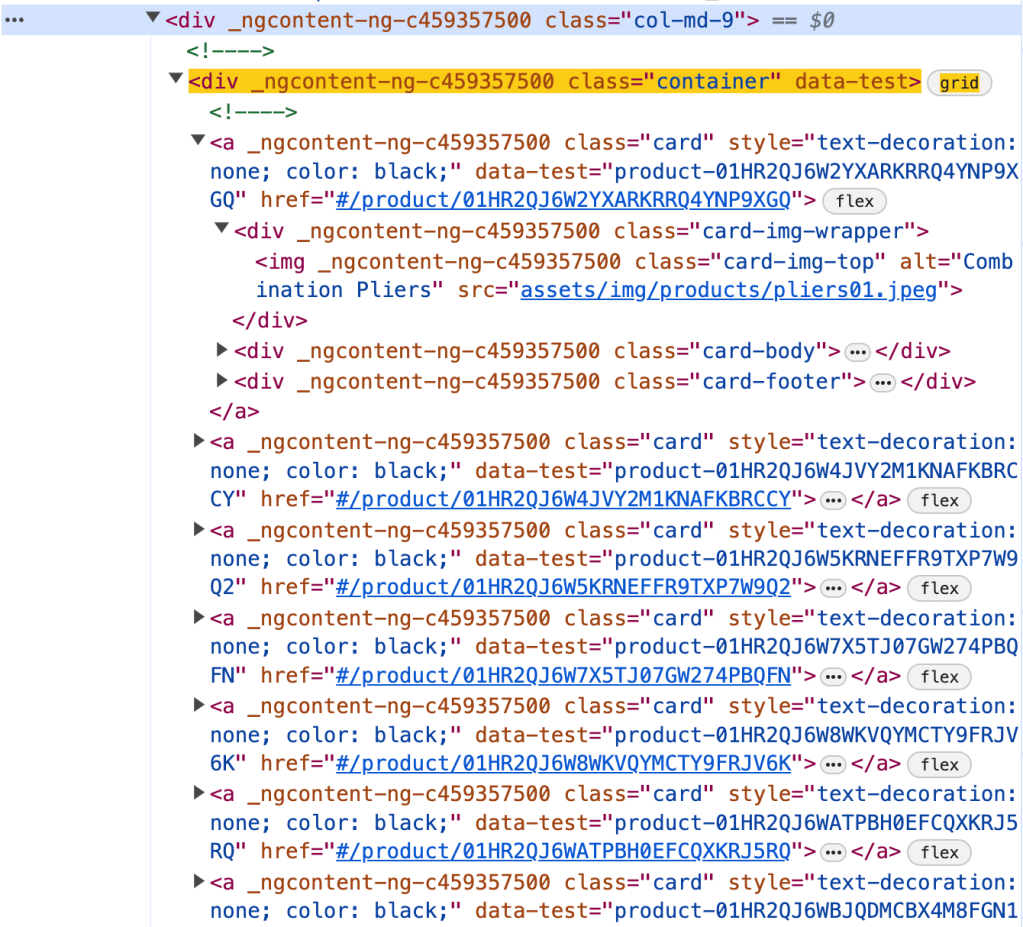
    A solid locator/selector strategy is crucial for ensuring that your tests are stable and maintainable. This means using selectors that are resilient to changes in the UI and are as specific as necessary to avoid false positives. It’s important to explore framework-specific best practices for locator or selector strategies. For example, Playwright best practices recommend using locators and user-facing attributes.

    To make your test framework resilient to DOM changes, avoid relying on the DOM structure directly. Instead, use locators that are resistant to DOM modifications:

    page.getByRole(‘button’, { name: ‘submit’ });

    Different frameworks may have their own guidelines for building element locating strategies, so it’s beneficial to consult the tool-specific documentation for best practices.

    Hard-coded values.

    Hard-coded values might be dangerous to automation framework flexibility and maintainability in the future. There are a few questions you might ask while reviewing: 

    1. Can we use data models to verify data types at runtime? Consider implementing data models to validate data types during execution, ensuring robustness and reducing errors.
    2. Should this variable be a shared constant? Evaluate if the value is used in multiple places and would benefit from being defined as a constant for easier maintenance.
    3. Should we pass this parameter as an environment variable or external input? This approach can significantly improve configurability and adaptability.
    4. Can we extract this value directly from the API interface? Investigate if the value can be dynamically retrieved from the API, reducing the need for hard-coding and improving reliability.

    Is the code properly abstracted and structured?

    As test automation code tends to grow rapidly, it is important to ensure that common code is properly abstracted and reusable by other tests. Data structures, page objects and API utilities should be separated and organized in the right way. 

    But don’t overuse abstraction and tolerate little duplication in favour of readability.

    Code Comments

    Code comments should not duplicate information the code can provide. Comments should provide context and rationale that the code alone cannot. Additionally, functions and classes should follow a self-explanatory naming convention, making their purpose clear without needing additional comments.

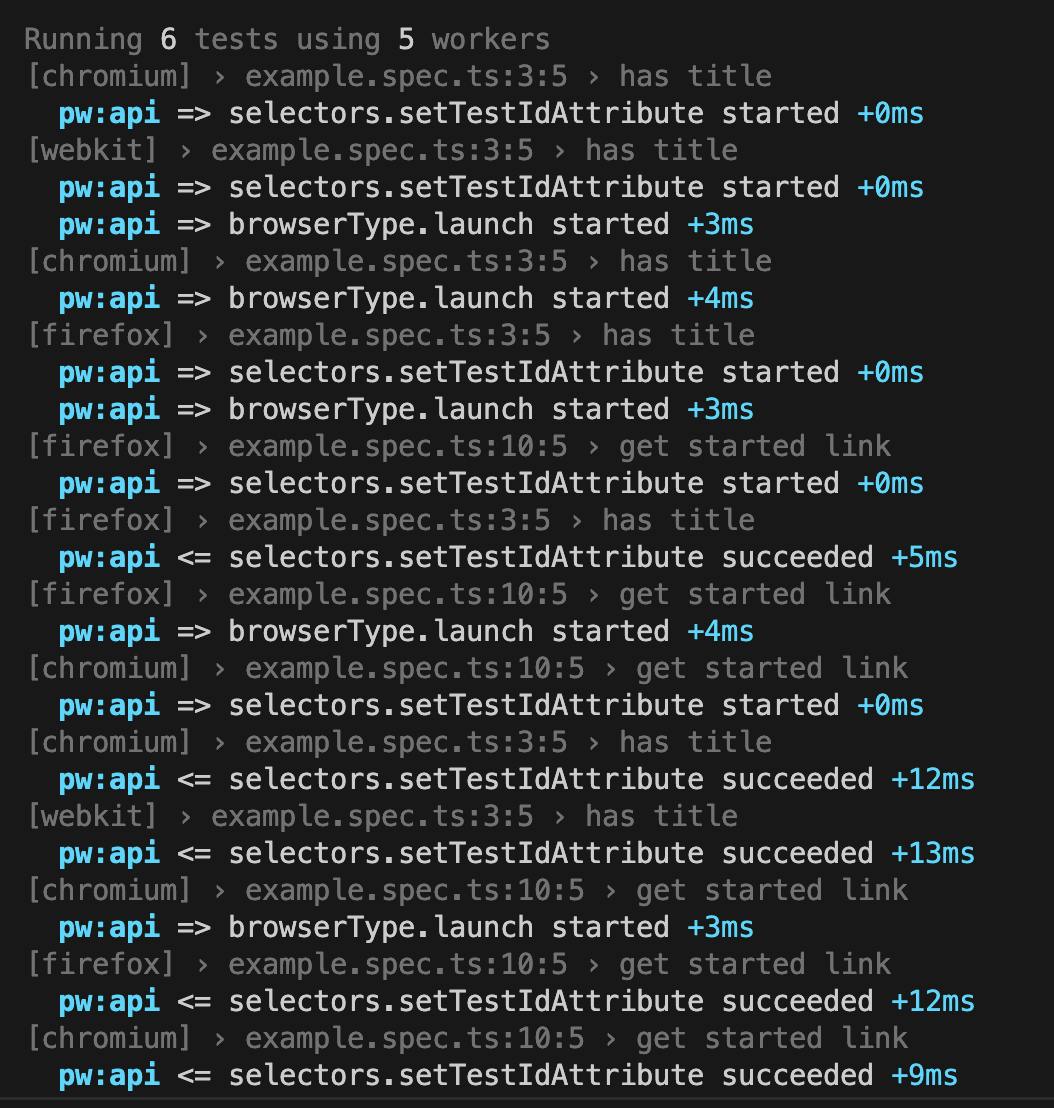
    “Trust, but verify.”

    Don’t rely on an automated test until you’ve seen it fail. If you can’t modify the test to produce a failure, it might not be testing what you intend. Additionally, be wary of unstable test cases that intermittently pass or fail. Such tests need to be improved, fixed, or removed altogether to ensure reliability.

    Communication is the key.

    Navigating the human aspects of code reviews can be as challenging as the technical ones. Here are some strategies that have worked for me when reviewing code.

    1. I often engage with the code by asking clarifying questions. For example:
    • “How does this method work?”
    • “If this requirement changes, what else would need to be updated?”
    • “How could we make this more maintainable?”
    1. Praise the good! Notice when people did something well and praise them for it. Positive feedback from peers is highly motivating. 
    2. Focus on the code, not the person. It’s important to frame discussions around the code itself rather than the person who wrote it. This helps reduce defensiveness and keeps the focus on improving the code quality.
    3. Discuss detailed points in-person. Sometimes, a significant change is easier to discuss face-to-face rather than in written comments. If a discussion is becoming lengthy or complex, I’ll often suggest continuing it in person.
    4. Explain your reasoning. When suggesting changes, it’s helpful to explain why you think the change is necessary and ask if there might be a better alternative. Providing context can prevent suggestions from seeming nit-picky.

    Conclusion

    This is not an exhaustive list of considerations for code reviews. For more guidance, I recommend checking out articles by Andrew Knight and Angie Jones. Their insights can provide additional strategies to enhance your code review process.

  • Part3. Writing your first test case.

    Part3. Writing your first test case.

    Introduction:

    In this tutorial, we are going to explore public website: https://practicesoftwaretesting.com

    More examples of automation testing friendly websites you can find in the repo throughly curated by Butch Mayhew.

    In Playwright, structuring a test suite involves organizing your test cases within descriptive blocks (test.describe) and utilizing setup and teardown functions (test.beforeEach and test.afterEach) to ensure consistent test environments. Here’s a brief description of each component and an example:

    1. test.describe block provides a high-level description of the test suite, allowing you to group related test cases together. It helps in organizing tests based on functionality or feature sets.
    2. Inside test.describe, individual test cases are defined using the test block. Each test block represents a specific scenario or behavior that you want to verify.
    3. test.beforeEach block is used to define setup actions that need to be executed before each test case within the test.describe block. It ensures that the test environment is in a consistent state before each test runs.
    4. test.afterEach block is utilized for defining teardown actions that need to be executed after each test case within the test.describe block. It helps in cleaning up the test environment and ensuring that resources are properly released.

    Here’s an example demonstrating the structure of a test suite in Playwright:

    import { chromium, Browser, Page } from 'playwright';
    
    // Define the test suite
    test.describe('Login functionality', () => {
      let browser: Browser;
      let page: Page;
    
      // Setup before each test case
      test.beforeEach(async () => {
        browser = await chromium.launch();
        page = await browser.newPage();
        await page.goto('https://example.com/login');
      });
    
      // Teardown after each test case
      test.afterEach(async () => {
        await browser.close();
      });
    
      // Test case 1: Verify successful login
      test('Successful login', async () => {
        // Test logic for successful login
      });
    
      // Test case 2: Verify error message on invalid credentials
      test('Error message on invalid credentials', async () => {
        // Test logic for error message on invalid credentials
      });
    });
    

    DOM Terminology

    Before we start writing test cases, it will be useful to brush up our memory on DOM Terminology

    1. HTML tags are simple instructions that tell a web browser how to format text. You can use tags to format italics, line breaks, objects, bullet points, and more. Examples: <input>, <div>, <p>
    2. Elements in HTML have attributes; these are additional values that configure the elements or adjust their behavior in various ways to meet the criteria the users want. Sometimes these attributes can have a value and sometimes doesn’t. Refer to Developer Mozilla Website for more information.”Class” and “id” are the most used attributes in HTML. (image: show class attribute, class value)
    3. Value in between angle braces is a plain text
    4. HTML tags usually come in pairs of Opening and Closing Tags.

    Locator Syntax Rules

    Locate Element by tag name:

    page.locator('img');

    Locate by id:

    page.locator('.img-fluid');

    Locate by class value:

    page.locator('.img-fluid');

    Locate by attribute:

    page.locator('[data-test="nav-home"]');

    Combine several selectors:

    page.locator('img.img-fluid');

    Locate by full class value:

    page.locator('[class=collapse d-md-block col-md-3 mb-3]');

    Locate by partial text match:

    page.locator(':text("Combination")');

    Locate by exact text match:

    page.locator(':text-is("Combination Pliers")');

    XPATH:

    As for XPath: it is not recommended approach to locate elements according to Playwright Best Practices:

    Source: https://playwright.dev/docs/other-locators#xpath-locator

    User-facing Locators.

    There are other ways to locate elements by using built-in APIs Playwright provides.

    There is one best practice we have to keep in mind: automated tests must focus on verifying that the application code functions as intended for end users, while avoiding reliance on implementation specifics that are not typically visible, accessible, or known to users. Users will only see or interact with the rendered output on the page; therefore, tests should primarily interact with this same rendered output. Playwright documentation: https://playwright.dev/docs/best-practices#test-user-visible-behavior.

    There are recommended built-in locators:

    1. page.getByRole() to locate by explicit and implicit accessibility attributes.
    2. page.getByText() to locate by text content.
    3. page.getByLabel() to locate a form control by associated label’s text.
    4. page.getByPlaceholder() to locate an input by placeholder.
    5. page.getByAltText() to locate an element, usually image, by its text alternative.
    6. page.getByTitle() to locate an element by its title attribute.
    7. page.getByTestId() to locate an element based on its data-testid attribute (other attributes can be configured).

    Let’s check out the example:

    test('User facing locators', async({page}) => {
    await page.getByPlaceholder('Search').click();
    await page.getByPlaceholder('Search').fill("Hand Tools");
    await page.getByRole('button', {name: "Search"}).click();
    await expect (page.getByRole('heading', {name: "Searched for: Hand Tools"})).toBeVisible();
    })

    where we would like to explore search functional test:

    Part of the page to be tested
    1. click on the Search Placeholder
    Search placeholder HTML

    await page.getByPlaceholder('Search').click();

    2. enter “Hand Tools” text to search for available items.

    await page.getByPlaceholder('Search').fill("Hand Tools");

    3. locate Search button and click it to confirm.

    Search button HTML

    4. Then we have to verify if no items have been found by asserting text on this page:

    Result after clicking on Search button
    No Result Found HTML

    await expect (page.getByRole('heading', {name: "Searched for: Hand Tools"})).toBeVisible();

    5. Run this test case and make sure test is passing.

    Assertions

    Playwright incorporates test assertions utilizing the expect function. To perform an assertion, utilize expect(value) and select a matcher that best represents the expectation. Various generic matchers such as toEqual, toContain, and toBeTruthy are available to assert various conditions.

    General Assertions

    // Using toEqual matcher
    test('Adding numbers', async () => {
    const result = 10 + 5;
    expect(result).toEqual(15);
    });

    Assert that the title of the product is “Combination Pliers”.

    Element on the page
    Element HTML
    const element = page.locator('.col-md-9 .container').first().locator('.card-title');
    const text = element.textContent();
    expect(text).toEqual('Combination Pliers');

    Locator Assertions

    Playwright provides asynchronous matchers, ensuring they wait until the expected condition is fulfilled. For instance, in the following scenario:

    const element = page.locator('.col-md-9 .container').first().locator('.card-title');
    await expect(element).toHaveText('Combination Pliers');

    !Note: do not forget to use await when asserting locators

    Playwright continuously checks the element with the test id of “status” until it contains the text “Combination Pliers”. This process involves repeated fetching and verification of the element until either the condition is satisfied or the timeout limit is reached. You have the option to either specify a custom timeout or configure it globally using the testConfig.expect value in the test configuration.

    By default, the timeout duration for assertions is set to 5 seconds.

    There are two types assertion though: Auto-Retrying Assertions and Non-Retrying Assertions.

    Auto-Retrying assertions provided below will automatically retry until they pass successfully or until the assertion timeout is exceeded. It’s important to note that these retrying assertions operate asynchronously, necessitating the use of the await keyword before them.

    Non-Retrying assertions enable testing various conditions but do not automatically retry.

    It’s advisable to prioritize auto-retrying assertions whenever feasible.

    Soft Assertions

    As a default behavior, when an assertion fails, it terminates the test execution. However, Playwright offers support for soft assertions. In soft assertions, failure doesn’t immediately stop the test execution; instead, it marks the test as failed while allowing further execution.

    For example, if we take the previous example and put .soft it assertion, in case assertion fails, it will not lead to termination of test execution.

    const element = page.locator('.col-md-9 .container').first().locator('.card-title');
    await expect.soft(element).toHaveText('Combination Pliers');

    Conclusion.

    In conclusion, we’ve explored the aspects of writing test cases using Playwright. We delved into the standard structure of a test case, incorporating essential elements such as hooks and grouping for efficient test management. Additionally, we examined various strategies for locating elements within web pages. Lastly, we discussed the importance of assertions in verifying expected behaviors, covering different assertion techniques to ensure robust and reliable testing. Examples of code, you can see in repository.

  • Part2: Have your test cases been suffering from ‘Flakiness’?

    Part2: Have your test cases been suffering from ‘Flakiness’?

    This is the second part of a series on Playwright using Typescript and today we are going to talk about challenges in UI Test Framework and explore how leveraging Playwright Best Practices can help us overcome them.

    End-to-end test cases have unique challenges due to their complex nature, as they involve testing the entire application user flow from start to finish. These tests often require coordination between different systems and components, making them non-sensitive to environmental inconsistencies and complex dependencies.

    What are other challenges we might encounter while working with UI Test Frameworks?

    1. Test cases can be slow to execute, as they often involve the entire application stack, including backend, frontend, database.
    2. End-to-End tests can be fragile, as they vulnerable to breaking whenever there is a change in DOM, even if the functionality stays the same.
    3. UI Tests consume more resources compared to other types of testing, requiring robust infrastructure to run efficiently.
    4. This type of test cases suffering from flakiness. Oh, yes, did I say flakiness? It could be a very annoying problem.

    Flaky tests pose a risk to the integrity of the testing process and the product. I would refer to great resource where The Domino Effect of Flaky Tests described.

    Main idea: while a single test with a flaky failure rate of 0.05% may seem insignificant, the challenge becomes apparent when dealing with numerous tests. An insightful article highlights this issue by demonstrating that a test suite of 100 tests, each with a 0.05% flaky failure rate, yields an overall success rate of 95.12%. However, in larger-scale applications with thousands of tests, this success rate diminishes significantly. For instance, with 1,000 flaky tests, the success rate drops to a concerning 60.64%. And seems, this problem is real and we have to handle it otherwise it will be “expensive” and annoying for test execution for a large-scale applications.

    Remember: Most of the time, flakiness is not the outcome of a bad test framework. Instead, it is the result of how you design the test framework and whether you follow its best practices.

    By following best practices and designing your tests carefully, you can prevent many flaky tests from appearing in the first place. That’s why before diving right into the implementation, let’s take a look at best practices for Playwright framework.

    1. Locate Elements on the page:

    • 👉 Use locators! Playwright provides a whole set of built-in locators. It comes with auto waiting and retry-ability. Auto waiting means that Playwright performs a range of actionability checks on the elements, such as ensuring the element is visible and enabled before it performs the click.
    await page.getByLabel('User Name').fill('John');

    await page.getByLabel('Password').fill('secret-password');

    await page.getByRole('button', { name: 'Sign in' }).click();

    await expect(page.getByText('Welcome, John!')).toBeVisible();
    • 👉 Prefer user-facing attributes over XPath or CSS selectors when selecting elements. The DOM structure of a web page can easily change, which can lead to failing tests if your locators depend on specific CSS classes or XPath expressions. Instead, use locators that are resilient to changes in the DOM, such as those based on role or text.
    • 🚫 Example of locator which could lead to flakiness in the future: page.locator('button.buttonIcon.episode-actions-later');
    • ✅ Example of robust locator, which is resilient to DOM change: page.getByRole('button', { name: 'submit' });
    • 👉 Make use of built-in codegen tool. Playwright has a test generator, which can generate locators and code for you. By leveraging this tool, you might get the most optimised locator. There is more information on codegen tool and capability to generate locators using VS Code Extension in the introductory article I wrote before.
    • 👉 Playwright has an amazing feature of auto-waiting. You can leverage this feature in web-first assertions. In this case, Playwright will wait until the expected condition is met. Consider this example: await expect(page.getByTestId('status')).toHaveText('Submitted'); . Playwright will be re-testing the element with the test id of status until the fetched element has the "Submitted" text. It will re-fetch the element and check it over and over, until the condition is met or until the timeout is reached. By default, the timeout for assertions is set to 5 seconds.
    • 🤖 The following assertions will retry until the assertion passes, or the assertion timeout is reached. Note that retrying assertions are async, so you must await them: https://playwright.dev/docs/test-assertions#auto-retrying-assertions
    • 🤖 Though you have to be careful, since not every assertion has auto-wait feature, please find them in the link by following this link: https://playwright.dev/docs/test-assertions#non-retrying-assertions.
    • ✅ Prefer auto-retrying assertions whenever possible.

    2. Design test cases thoughtfully:

    • 👉 Make tests isolated. Each test should be completely isolated, not rely on other tests. This approach improves maintainability, allows parallel execution and make debugging easier.
    • To avoid repetition, you might consider using before and after hooks. More ways of achieving isolation in Playwright, you can find by following this link: https://playwright.dev/docs/browser-contexts
    • Examples:
    • 🚫 Not Isolated test case which assumes that the first test case should always pass and it will be a precondition for the next one (in this case, in the first test case user is logging in, and then test case has been reused in the next one. What if the first test case has been failed?
    test('Login', async () => {
    // Login
    await login(username, password);

    // Verify Logged In
    await verifyLoggedIn();
    });

    test('Create Post', async () => {
    // Assuming already logged in for this test
    // Create Post
    await createPost(title, content);

    // Verify Post Created
    await verifyPost(title, content);
    });
    • ✅ In order to make test cases isolated, before and after hooks come handy to set up preconditions for the second test case.
    describe('Test Login', () => {

    // Login
    await login(username, password);

    // Verify Logged In
    await verifyLoggedIn();

    });

    describe('Post Management', () => {

    beforeEach(async () => {
    await login(username, password);
    });

    test('Create Post', async () => {
    // Create Post
    await createPost(title, content);

    // Verify Post Created
    await verifyPost(title, content);
    });

    // more test cases could be added
    });
    • 👉 Keep test cases small and avoid million assertions in one test case. Make sure, that one test case has one reason for test failure. You will thank yourself later for that.
    • 👉 Make sure you handle data correctly in the test case. Ensure that each test case is independent and does not rely on the state of previous tests. Initialize or reset the test data as needed before each test to prevent data dependency issues. When testing functionalities that interact with external services or APIs, consider using mock data or stubs to simulate responses.

    How to combat flaky tests?

    • 👉 Use debugging capabilities of Playwright tool. Run test cases with the flag --debug. This will run tests one by one, and open the inspector and a browser window for each test. it will display a debug inspector and give you insights on what the browser actually did in every step. 
    • 👉 Playwright supports verbose logging with the DEBUG environment variable: DEBUG=pw:api npx playwright test. In one of my articles, I also explain how to enable this mode from VSCode Extension.
    • 👉 Playwright provides a tracing feature that allows you to capture a detailed log of all the actions and events taking place within the browser. With tracing enabled, you can closely monitor network requests, page loads, and code execution. This feature is helpful for debugging and performance optimization.
    • To record a trace during development mode set the --trace flag to on when running your tests: npx playwright test --trace on
    • You can then open the HTML report and click on the trace icon to open the trace: npx playwright show-report.
    • 👉 You might want to slow down test execution by test.slow() to see more details. Slow test will be given triple the default timeout.
    • Example:
    import { test, expect } from '@playwright/test';

    test('slow test', async ({ page }) => {
    test.slow();
    // ...
    });

    Conclusion

    In conclusion, as you start working with new test automation tool, it’s vital to dive into best practices and familiarize yourself with the tool’s capabilities. Remember, flakiness isn’t solely the fault of the test tool itself; more often than not, it comes from how you utilize and implement it.

    Summing up best practices for Playwright:

    1. Utilize Locators and prioritize user-facing attributes.
    2. Ensure test isolation.
    3. Leverage built-in code generation functionalities.
    4. Make debugging your ally

  • Part1: Getting Started with Playwright using Typescript.

    Part1: Getting Started with Playwright using Typescript.

    Introduction

    This article will be part of a series focusing on the Playwright framework implemented with Typescript.

    Playwright is a modern web testing framework that is primarily used for testing web applications. It was developed by Microsoft and released in 2019. Playwright provides a set of APIs that allow developers to automate interactions with web pages, such as clicking buttons, filling out forms, and navigating through pages. It supports multiple programming languages including JavaScript, Python, and C#, making it accessible to a wide range of developers.

    Key Features:

    1. Playwright supports cross-browser test execution including Chromium, WebKit, and Firefox
    2. It is designed to work on various operating systems including Windows, Linux, MacOS
    3. Playwright offers a rich set of APIs for automating interactions with web pages. Developers can simulate user actions such as clicking, typing, hovering, and navigating through pages.
    4. Playwright includes built-in mechanisms for waiting for specific conditions to be met before executing further actions. This helps handle asynchronous behavior in web applications more effectively.
    5. Playwright provides parallel execution option out the box that can significantly reduce the overall execution time, especially for large test suites.
    6. It provides codegen capability to generate test steps and assertions.

    Moreover, Playwright uses unique approach for browser automation. Instead of launching a full new browser instance for each test case, Playwright launches one browser instance for entire suite of tests. It then creates a unique browser context from that instance for each test. A browser context is essentially like an incognito session: it has its own session storage and tabs that are not shared with any other context. Browser contexts are very fast to create and destroy. Then, each browser context can have one or more pages. All Playwright interactions happen through a page, like clicks and scrapes. Most tests only ever need one page.

    Setup the project

    Get started by installing Playwright using npm: npm init playwright@latest.

    Run the install command and select the following to get started:

    1. Choose between TypeScript or JavaScript (we are going to use TypeScript for this project)
    2. Name of your Tests folder (tests)
    3. Add a GitHub Actions workflow to easily run tests on CI (false)
    4. Install Playwright browsers (true)

    What is installed:

    playwright.config.ts
    package.json
    package-lock.json
    tests/
      example.spec.ts
    tests-examples/
      demo-todo-app.spec.ts
    

    This command will create a bunch of new project files, including:

    1. package.json file with the Playwright package dependency
    2. playwright.config.ts file with test configurations
    3. tests directory with basic example tests
    4. tests-examples directory with more extensive example tests

    Running Tests using command line.

    npx playwright test – run test cases in headless mode. In this case browser will not appear, all projects will be executed. On the screenshot below you can see that 4 test cases have been executed, all of them are passed, 2 workers have been used. Number of workers is configurable parameter in the playwright config.

    Playwright has built-in reporter. To see full report you can run npx playwright show-report command in the terminal.

    You can see test results, test duration, filter them by category “passed”, “failed”, “flaky”, “skipped”. All test cases marked with the name of project (in our case this is a name of the browser we are running test against). Moreover, you can expand and check test steps and traces (if available).

    If you want to run against one particular browser, run: npx playwright test --project=chromium.Test cases will be executed in headless mode.

    Headed mode: npx playwright test --project=chromium --headed

    In order to execute only one test spec add the name of the test spec: npx playwright test <name-of-the-test-spec> --project=chromium

    If you’d like to execute only one specific test case: npx playwright test -g <name-of-the-test-case> --project=chromium

    To skip test case add test.skip in test case file, like:

    import { test, expect } from '@playwright/test';

    test.skip('has title', async ({ page }) => {
    await page.goto('https://playwright.dev/');

    // Expect a title "to contain" a substring.
    await expect(page).toHaveTitle(/Playwright/);
    });

    test('get started link', async ({ page }) => {
    await page.goto('https://playwright.dev/');

    // Click the get started link.
    await page.getByRole('link', { name: 'Get started' }).click();

    // Expects page to have a heading with the name of Installation.
    await expect(page.getByRole('heading', { name: 'Installation' })).toBeVisible();
    });

    Result after test execution:

    Report shows that two test cases are skipped as intended:

    While test development you might need to run only one test. In this case use test.only.

    Test execution in UI mode.

    One of its most helpful features is UI mode, which visually shows and executes tests.

    To open UI mode, run the following command in your terminal: npx playwright test --ui

    Once you launch UI Mode you will see a list of all your test files. You can run all your tests by clicking the triangle icon in the sidebar. You can also run a single test file, a block of tests or a single test by hovering over the name and clicking on the triangle next to it.

    In the middle you will see a step-by-step trace of the test execution, together with screenshots of each step. It is also important to mention that you can debug test case here by checking “before” and “after” view, code source, logs and errors. One flaw of this mode is that the browser is not a browser itself, technically this is simply screenshot. That’s why it is more convenient to use it in combination with Playwright Extension (in VSCode).

    Test Execution with Playwright Extension.

    Install Extension by navigating to Preferences -> Extensions. Search for official extension called Playwright Test for VSCode, hit Install button. Once it’s been installed, navigate to Testing section on the left panel. List of test cases should be loaded.

    Before running test cases, you might want to provide specific settings by enabling/disabling headed execution, choosing target project, enabling / disabling trace generation. It is also possible to leverage codegen capabilities by recording test case, picking locator.

    Important point for this type of execution, that after execution is completed, browser stays open and you can easily interact with elements on the page like in real browser.

    Make debugging your friend.

    Playwright provides a tracing feature that allows you to capture a detailed log of all the actions and events taking place within the browser. With tracing enabled, you can closely monitor network requests, page loads, and code execution. This feature is helpful for debugging and performance optimization.

    To record a trace during development mode set the --trace flag to on when running your tests: npx playwright test --trace on

    You can then open the HTML report and click on the trace icon to open the trace: npx playwright show-report

    At the first glance the report looks the same:

    But you can find more information inside when you open one of the test case information:

    Also, to open trace you can run this command from the terminal: npx playwright show-trace path/to/trace.zip

    To debug all tests run the test command with the --debug flag. This will run tests one by one, and open the inspector and a browser window for each test: npx playwright test --debug

    Generating Test Code

    Playwright provides a codegen feature that allows users to easily generate code for their browser automation scripts. The Codegen feature in Playwright captures user interactions with the webpage, such as clicks, fills, and navigation, and then translates these interactions into executable code. This makes it easier for developers to create and maintain browser automation scripts, as they can simply record their actions and generate code.

    To launch code generator, run: npx playwright codegen

    Try loading a web page and making interactions with it. You’ll see Playwright code generated in real time. Once recording is complete, you can copy the code and refine it into a test case.

    With the test generator you can record:

    1. Actions like click or fill by simply interacting with the page
    2. Assertions by clicking on one of the icons in the toolbar and then clicking on an element on the page to assert against. You can choose:
      • 'assert visibility' to assert that an element is visible
      • 'assert text' to assert that an element contains specific text
      • 'assert value' to assert that an element has a specific value

    Once you’ve done with changes, you can press the 'record' button to stop the recording and use the 'copy' button to copy the generated code to your editor.

    Conclusion.

    In this introductory article, we made a journey to creating a Playwright framework using Typescript. We delved into executing test cases, setting up the development environment, and installing necessary extensions. Additionally, we gained insights into debugging properly and speeding up development process through the utilization of the built-in codegen functionality.

    Resources.

    1. Official Documentation: https://playwright.dev/
    2. Repository with the framework: https://github.com/nora-weisser/playwright-typescript

  • Enabling debugging functionalities in Playwright tests for VSCode.

    Enabling debugging functionalities in Playwright tests for VSCode.

    Playwright provides bunch of powerful features for debugging! And one of them is verbose logging. According to the Playwright documentation, by running the command:

    DEBUG=pw:api npx playwright test

    you can get detailed overview of what is happening behind the scenes.

    If you make a step further and install Playwright Extension, which will give you the whole spectrum of opportunities for effective test development, like: running tests with a single click, easier configuration, codegen capabilities, etc.

    While utilising all these awesome capabilities, you might miss verbose logging in test output.

    How to put all these nice capabilities (leveraging Playwright Extension features and verbose logging) together? There is a way: let’s add one line of code in VSCode Playwright Extension configuration file.

    Steps to achieve it:

    1. In your VSCode IDE navigate to Extensions
    2. Find Playwright Extension and click on gear icon. Navigate to extension settings.
    3. Click on Edit in settings.json
    1. Add one line of configuration: "DEBUG": "pw:api"COPY "playwright.env": { "DEBUG": "pw:api" }
    2. Save setting.json file and close it.
    3. Run test cases again in a Testing tab and check
    4. Check Test Output and voilà!